The Anarchist's Tool Chest (the class)
I was lucky to get in from the wait list for Christopher Schwarz's Anarchist Tool Chest class at Roy Underhill's Woodwright's School for a week in September. Unlike the other woodworking classes I've signed up for, I actually managed to find the time to disappear for a while, and it was absolutely worth the time, energy, and money of a week-long trip to North Carolina. The book is good, but the class was amazing.
There were nine of us in the class, with Schwarz as lead instructor and Underhill as a very active participant. It was a great combination, as each of them had a different style and tool set, but pretty much shared a core set of values and techniques. Schwarz's tool chest included more recently-made tools while Underhill's shop is filled with vintage, and Schwarz brought a dovetail marker and Underhill disapproved of it. Schwarz spoke occasionally of power tools, while the only 'power' tools in Underhill's shop were treadle-powered. They were both clearly convinced that the way hand tools make you approach a project is the right way to do things, however.
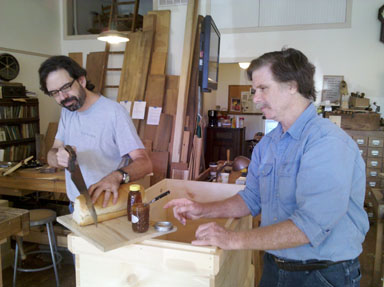
Chris and Roy serve a woodworker's communion.
I think nearly all of us identified ourselves as beginners at the start of the class, but it became clear quickly that some of us - me in particular - were more beginner than others. A number of people had taken classes at the school before, and some even had a reasonable set of tools to stock the enormous tool chest we were building. Many - maybe most? - of us didn't have a workbench at home, however, so it was especially good to work in a fully-equipped shop.
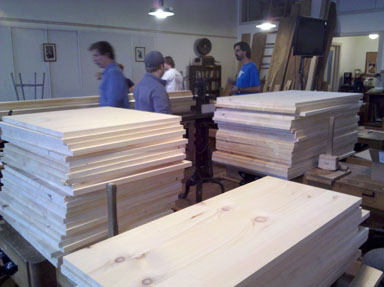
The other key was materials. In the book, Schwarz recommends Eastern White Pine. In a previous version of the class, they had used poplar, which slowed things down dramatically. For this class, they ordered sheets of glued-up pine at the right size for the sides and close to the right size for the top. There was still cutting to be done, for the bottom, battens, skirts, rails and stiles of the top, and the dust seal, which Schwarz and the faster students did during the class. The pine wasn't perfect - I think it's safe to say it had more knots than Schwarz recommended in the book - but it was extremely workable and we got through things ahead of schedule (for most people) or on schedule (for me).
The tool chest was bigger than I'd imagined, even though I'd contemplated the dimensions. Somehow I'd expected something more like Schwarz's traveling chest, which still felt large by itself but small in comparison to what we built.
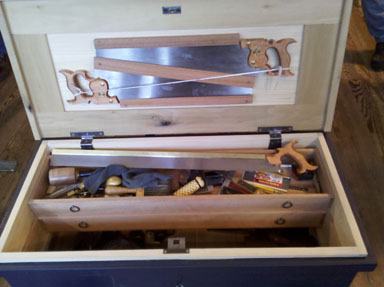
Schwarz's well-stocked travel tool chest with a special saw of Underhill's on top.
Schwarz didn't just bring his tools - he also brought his sharpening station. For a few of us this was our first serious experience with water stones, and he encouraged students to use his, even after one broke. He started that first day cleaning up the stones on the sidewalk outside of the storefront, a space that got used a few times for other parts of the project and to show an amazing knock-down Moravian workbench.
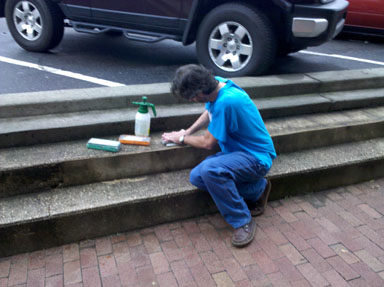
Using the great outdoors to clean up sharpening stones.
There were a few new (old) tools that really blew my mind, in ways I hadn't figured out by reading or watching videos. One of the best tools, and one I wound up buying before I left, was dividers. Discussions of dividers always seemed to be lacking the crucial question of where and how you set them, and Schwarz showed us how to set two pairs of them by eye to produce even marks for dovetails. One represented half a pin width, and the other the distance between the edge of one tail and the same edge of the next tail. It seemed like magic, and worked well.
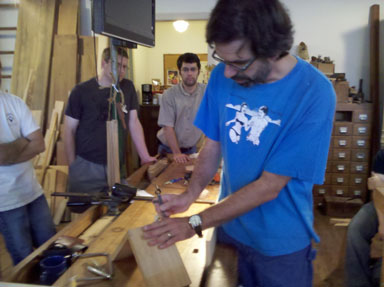
Schwarz demonstrates using dividers to set up dovetails.
Although Underhill's shop resolutely avoiding electricity for the actual woodworking, he used it for lighting, air conditioning, and a camera and monitor that made it much easier to provide a close-up view to a big group of students. Schwarz used it a few times when demonstrating a new technique, and it was much easier than crowding in for an imperfect view.
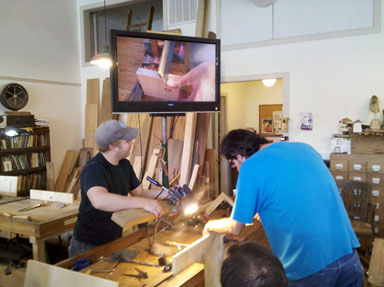
Demonstrating sawing with a video close-up.
Despite Schwarz's admonitions, I still managed to screw up twice, in the same place, on the tails for the dovetails in the top rear corners of the chest. Somehow I decided to cut through a tail piece rather than create it by removing the pins. I panicked for a moment, but he just pulled out blue painter's tape to indicate the error for a later fix, pointing out that both paint and the top skirt and dust seal would cover the damaged area anyway.
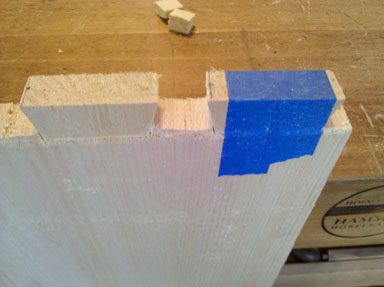
Blue tape marks my error, making it easier to track and cover.
I stayed roughly on the original schedule, though there were a few times early in the week when I wondered whether I would even have the basic box done by the end of the class, never mind the skirts or lid. Schwarz helped by emphasizing that I was on schedule and would make it, and he was mostly right. Each corner completed was a major relief, even though in speeding up a bit at the end I left more gaps than I'd hoped for.
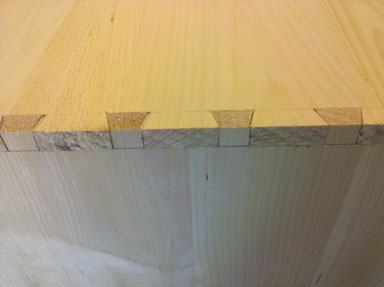
A corner of the chest, dovetailed.
Still, I spent most of my time downstairs, when it might have been a lot of fun to explore The Woodwright's School Tool Store, an astounding collection of vintage tools. Ed Lebetkin, who ran the store, not only let people try out the tools downstairs, but was also a regular presence in the classroom answering questions and offering encouragement. I visited the store the first day, but it wasn't until the very end of the very last day that I felt I had the time to visit. (That's where I got the dividers, as well as a nice eggbeater drill and a Woodwright's Shop video.)
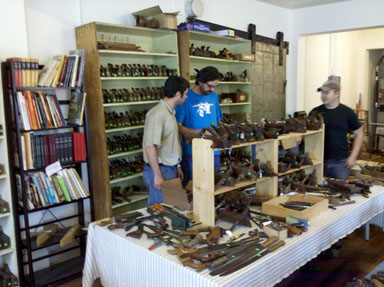
Ed Lebetkin's amazing tool store upstairs.
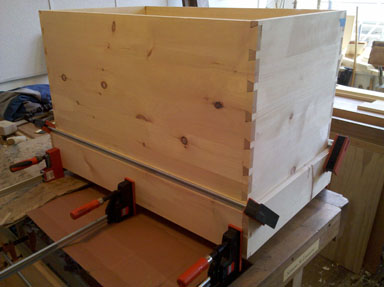
I was very very happy to glue up my chest there. Assembly and glue-up went much much faster with the help of fellow students. We used traditional hot hide glue on all four of the chest's corners, then clamped up the chest. A student from a previous class came in with a huge stack of extra clamps for us to use, which proved useful for this time when multiple people had lots of work being clamped. While we all spent a fair amount of effort squaring up our chests, I was happy that mine was pretty close to square at its initial clamping.
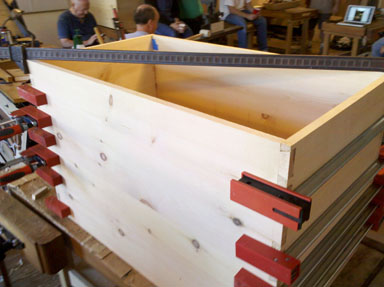
My tool chest poses as a clamp rack.
After that dovetail marathon, it was time to switch gears. The bottom boards needed to be connected with tongue and groove joints, and then their top surfaces needed a bead. That sounded like a lot of work until I went to do it - a Stanley #48 tongue and groove plane made it astonishgly easy, and a wooden beading plane was even less work for more beautiful reward. I know it was pine, but those few moments transformed how I see my router, and I think I'll be doing a lot less with it.
After the boards were prepared, I nailed them to the bottom of the chest with cut nails. I'd read Schwarz's praise of these fasteners, but hadn't actually tried them. Pre-drilling with an eggbeater drill was easy, and the nails went in easily. I had one tiny glitch in adding a set of battens when I tried to put one nail on top of another, but it all worked smoothly.
After all the easy parts, there was some punishment ahead - planing the boards flat against the edge of the box. That meant a lot of planing edge grain, and afterwards I wished I'd remembered to pack my flush-cutting saw, which would at least have reduced the planing if not eliminated it. I also dreamed briefly and heretically of my belt sander.
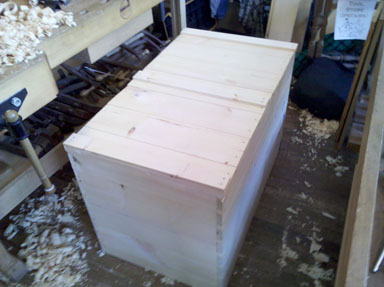
Chest bottom, nailed and planed.
After that, it was on to the bottom skirt. I assembled the initial two corners, which felt easy, a mere two dovetails, after the previously endless box. I also used a square ovolo molding plane to put a slightly decorative edge on the top of the skirts, and again, the molding plane was amazing.
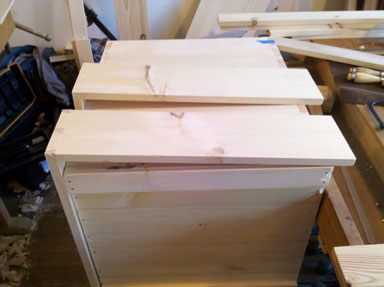
Bottom skirt, partially assembled.
Schwarz wisely insisted that we all work with a "skirt buddy" to mark the final lengths of the other two corners. This way we wound up with a bottom skirt that actually fit the box as it was instead of an ideal measurement that didn't fit any real box.
I didn't get to the top skirt. I'd like to say that I carefully saved it to be a demonstration project at home - it will be - but really I just ran out of time. I was happy to have the bottom skirt on.
On the last day, Friday, we all shifted gears to work on the top of the chest. Roy Underhill led this one, showing us how to create a mortise-and-tenon joint by hand, fitting around a panel grooved with the #48 plane again. One especially fun part of this was using one of his "machines" - a foot-powered mortiser.
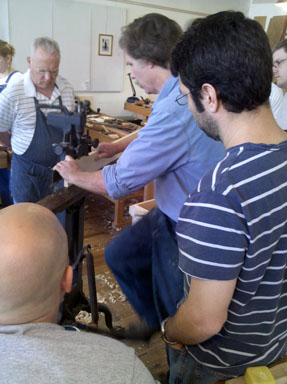
Roy Underhill demonstrates his amazing foot-powered mortiser.
I doubt I'll add a foot-powered mortiser to my shop - I'm not sure how I'd find one again - but it was a great demonstration of how much we can do with relatively simple (if large) and sharp tools.
I successfully marked out my tenons, and the shoulder cuts went well. I have some problems to address with the cheeks, however, and that was where I ran out of time, around 6:00pm on Friday with a long drive home.
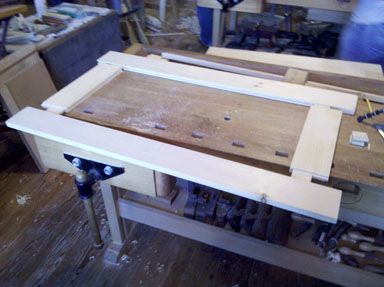
As far as I got with the lid - mortises, tenons, and grooves..
A few people did complete the box, getting at least some hardware - the hinges - installed. Schwarz demonstrated a few colors of milk paint, the finish he suggested, and we talked about hardware options and a variety of ways to lay out the interior. He paused the class occasionally to look over the school's tool chests, exploring the different layouts for different uses and some choices we would get to make when we got there.
I would absolutely recommend this class to anyone interested in working with hand tools, and I would also recommend Schwarz, Underhill, and The Woodwright's School for pretty much any related class. I was nervous going in, and slow throughout, but everything seemed set up to calm me down, help me through, and make sure I went home with not just a box, but new skills and fond memories.
I'll post more when I finish the box, but for right now I'm just very pleased.
If you'd like to see more, Schwarz's videos from our class tell a good story:
(And other interesting videos - previous Anarchist Tool Chest class at The Woodwright's School: Day 1 Day 2 Day 3 Day 4 Day 5 How to Use a Tool Chest Chris Schwarz's videos)
